


- Info
- Specs
- How To
- FAQ
- Video
What Does It Do?
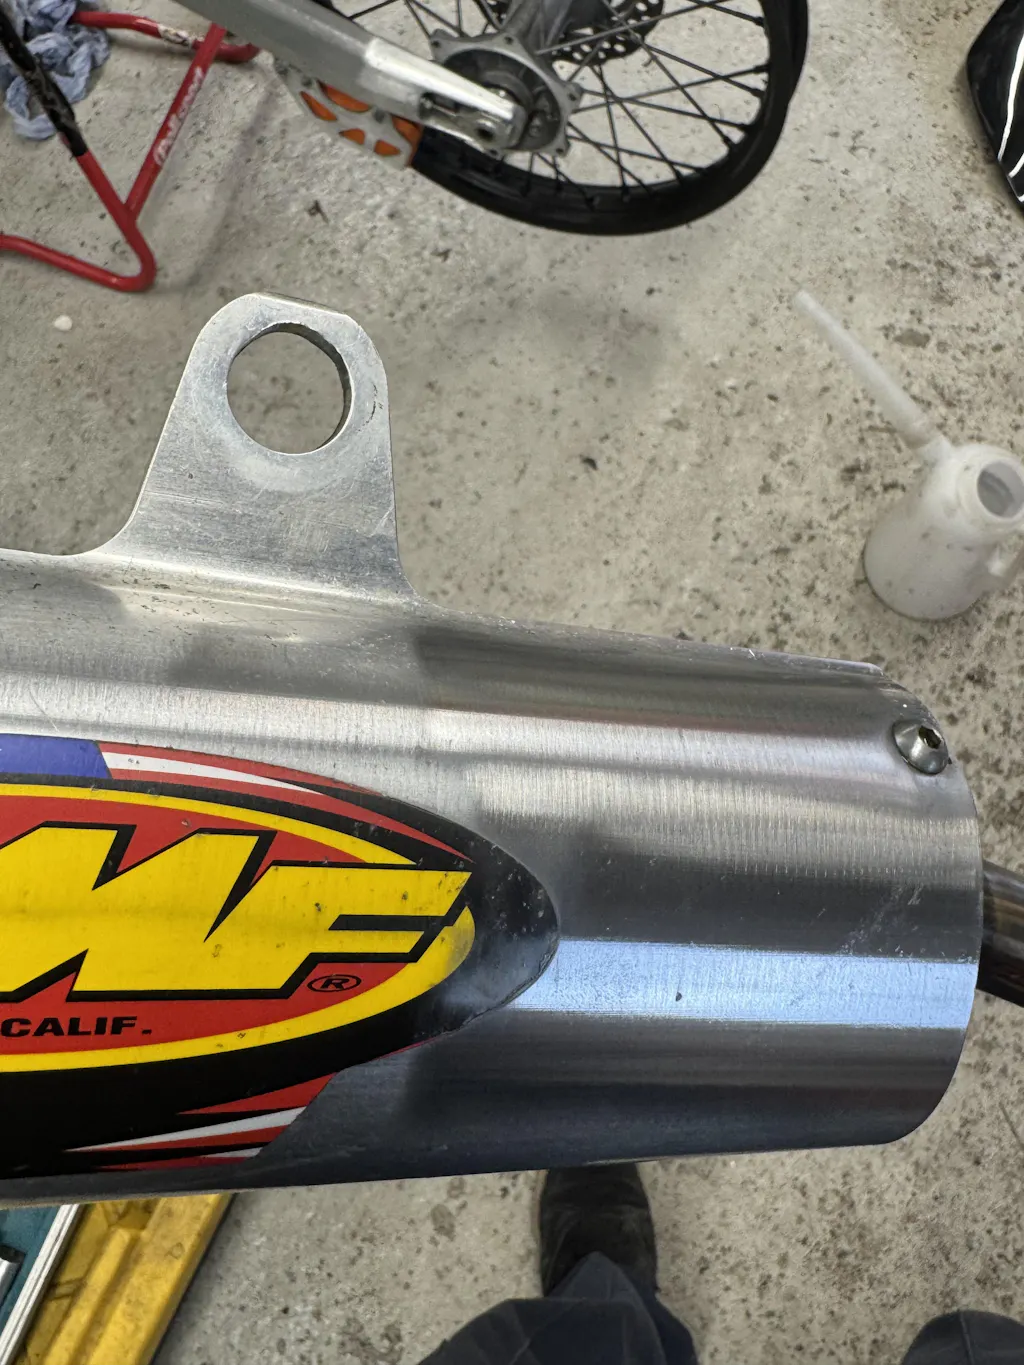
- Sands out scratches and sun damage
- Produces a beautiful shine on plastic
How Does It Work?
This kit includes sandpaper discs and polishing wheels. The sandpaper removes scratches and sun fading. After the plastic has been sanded smooth, the polishing wheels are used to produce a shine.
The sandpaper discs can be used on a machine sander or by hand. They are available in 3", 5", and 6" kits. For machine sanding, you can use either a drill (3" kit) or 5" or 6" sander (orbital or dual action). The hand sanding kits are available in 3" and 5" sizes.
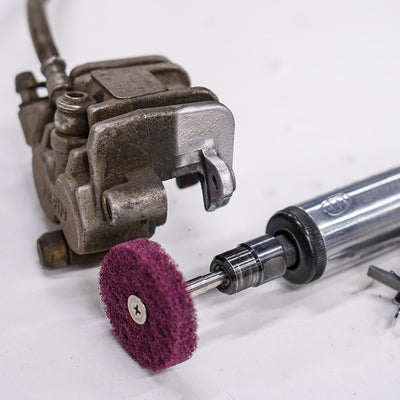
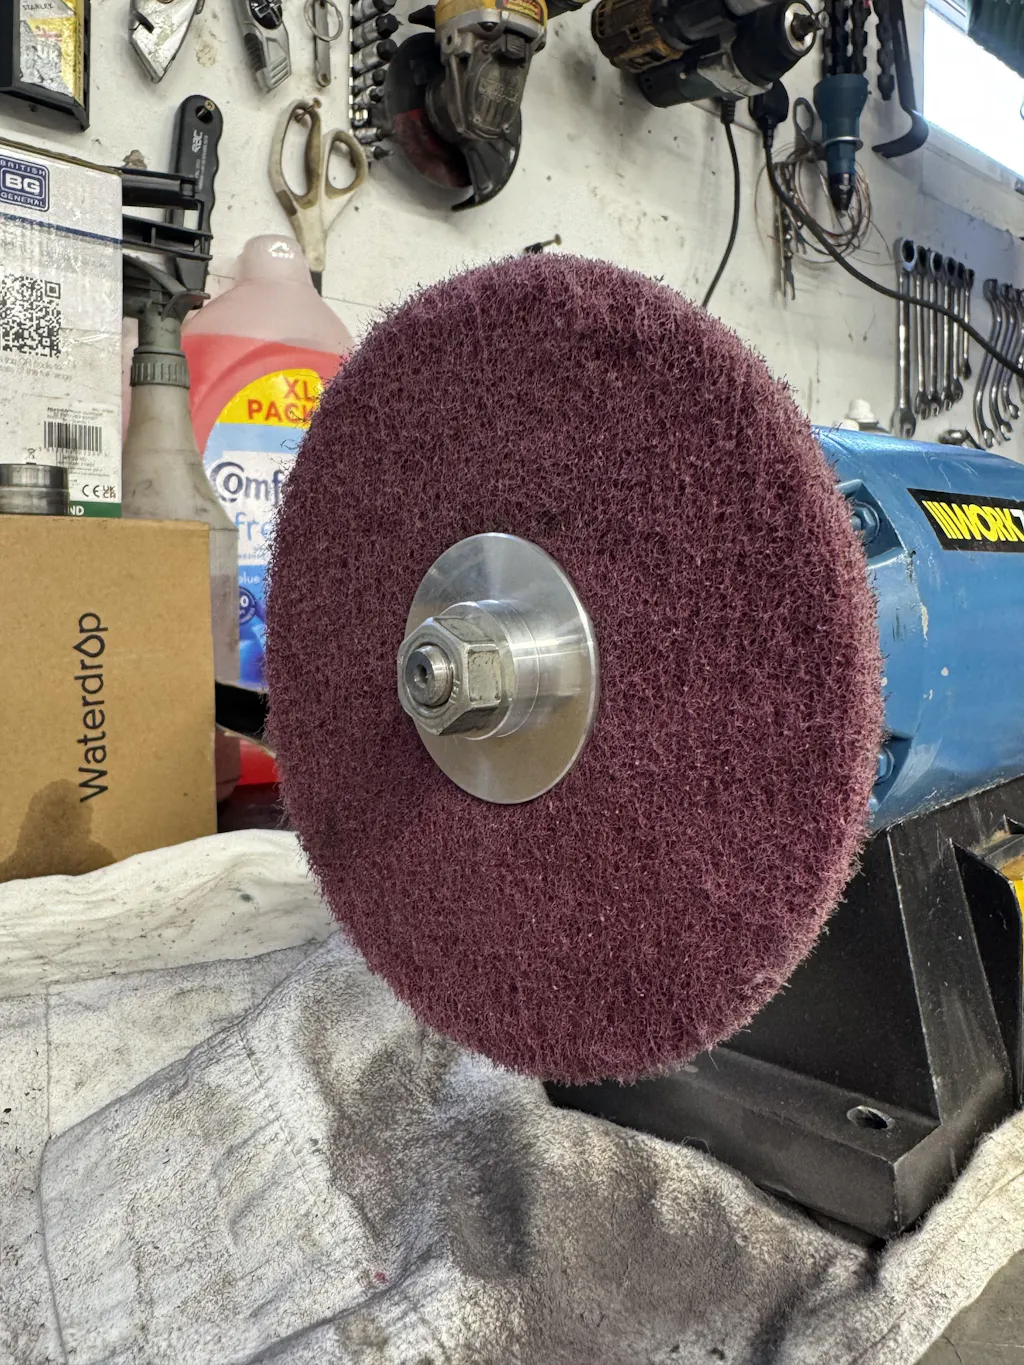
The polishing wheels are designed to be mounted on a bench grinder.
Machine Kits Include:
- 45 Sandpaper Discs (5 of each grit)
- 2 Polishing Wheels
- 1 Polishing Compound (3.5 oz bar)
- Guide Coat
- Full Instructions
- 3" kit comes with drill adapter
Hand Kits Include:
- 45 Sandpaper Discs (5 of each grit)
- 2 Polishing Wheels
- 1 Polishing Compound (3.5 oz bar)
- Sanding Block
- Guide coat
- Full Instructions
The 3" drill kit comes with an adapter pad to attach the sandpaper to. The 5" and 6" kits do not have an adapter, you must have a hook and loop pad attached to your sander already (most sanders come with them). See the "Tips" tab for sander recommendations.
Click on "Video" tab to see the kit in use.
-Bench grinder or sanders not included.
-Always wear a dust mask or respirator and proper eye protection while polishing!
Related Items
- Click here to purchase the polishing wheels separately
- Click here to purchase the polishing compound separately
- Click here to purchase the sandpaper discs and drill adapter separately
- Click here to purchase the hand sander separately
- Click here to purchase a bench grinder extension (allows for more room while buffing)
Specs
- Proprietary polishing wheel design beautifully polishes plastic without causing damage
- Polishing wheels are 6" diameter and 1/2" wide
- Max RPM of wheels: 3600
- Polishing wheels are available for 1/2" (12.7mm), 5/8" (16mm), and 3/4" (19mm) buffer shaft sizes (select upon checkout)
- Compound is a unique blend formulated for plastics. It's made with a fine abrasive that gently smooths scratches without damage the plastic. Compound is solid in form but melts onto the polishing wheel as it's spinning.
How To
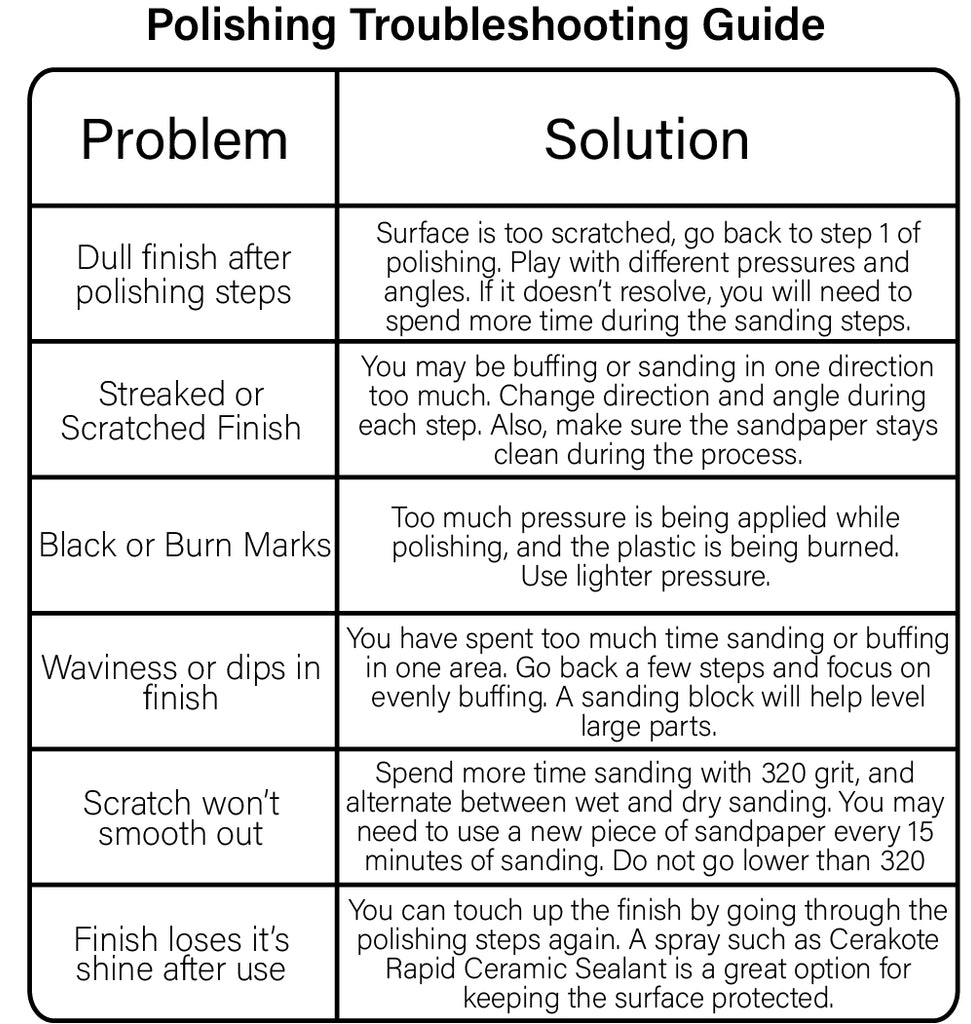
Please refer to the buffing chart at the bottom of this tab for the steps necessary to restore plastic.
Keep in mind, if you are looking to achieve the best possible finish, you will need to do all stages of sanding and polishing. You cannot go right to the final step and expect a great finish. Plastics (especially white) that are yellowed from fuel cannot be fixed with this method. Crease marks from bending also cannot be sanded or polished out.
Sanding
-Sanding is the most important step in plastic polishing, take your time and follow each step carefully.
-Clean your part thoroughly prior to sanding.
-Position your part so it stays in place while sanding. For example, most gas tanks fit over a saw horse. This will make sanding much easier.
-If your part has deep scratches, start with 320 grit sandpaper. For parts with minor scratches, begin with 400 grit. You will work your way up to 2000 grit in the remaining steps.
-Start by sanding dry with the first grit of sandpaper you choose. Once the sandpaper starts to lose it’s effect, sand the part with soapy water to clean it.
-Sand in different directions and patterns to achieve the most uniform finish. Use light to medium pressure while sanding, heavy pressure can gouge the part.
-Keep the sander moving across the part, do not stay in one area for very long. Keep the sander flat on the part to prevent dips in surface.
-Use machine sanders at medium speed. If using a drill to sand, you must use the provided foam pad to prevent gouging of the part.
-Keep sandpaper clean during sanding process.
-After the first sanding grit, check for any leftover scratches or pits. If they are not removed in the first stage of sanding, they will be visible in the final finish.
-You can check for scratches using the provided guide coat. Sprinkle a small amount of powder onto the part and rub it around with soapy water and a towel. The powder will fill any remaining scratches and make them visible. Once any scratches are located, sand them out and wipe off guide coat.
-After the first grit of sanding has been done, use wet sanding only for the remaining grits.
-Spend adequate time with the second grit of sandpaper, it is very important to remove scratches from the first grit of sandpaper.
-The final sand on each grit should be used with little pressure, let the machine or sanding block just glide along the part on each pass.
-Tighter areas may have to be sanded by hand, it can be tough get into crevices with a machine sander.
-Once you have sanded up to 2000 grit, clean the entire part with isopropyl alcohol and now you are ready for polishing!
Polishing
Step 1
-It is a good idea to test the polishing steps on a scrap piece beforehand, so you know how much pressure can be safely applied.
-Secure the polishing wheel marked “1” to buffer with a flange on either side. The first step uses a polishing compound to help smooth scratches from sanding.
-Apply compound to the spinning wheel for 2-3 seconds to allow it to melt on the wheel. It’s normal for fibers to fly off the during the first 30 seconds of use.
-Start with light pressure and move to very light pressure towards the end of each step.
-The polishing wheels must be used with caution, since heavy pressure will result in burns.
-Polish in different directions and patterns to achieve the most uniform finish.
-Keep the wheel moving across the part, do not stay in one area for more than a few seconds.
-The sweet spot to buff on the wheel is between 4 and 5 o’clock. Look at your buffing machine from the left side, and picture where 4 and 5 o’clock is on the wheel, it will be near the bottom. That is where you will want the part to touch the wheel when buffing.
-In order to prevent burning the plastic or flinging the part out of your hands, be careful around edges. The wheel should be spinning away from an edge and not towards it.
-Re apply compound when the polishing effect lessens. Every 2 to 3 minutes is a good interval.
-As you're polishing, any areas you missed while sanding will start to appear. Some areas may polish out during this step, while the larger imperfections will require additional sanding.
-Once you see a smooth scratch free finish, you are ready for the second step of polishing.
-After the first step of polishing, you MUST clean the part with isopropyl alcohol or contact cleaner to remove the polishing compound.
-Do not mix the wheels up, the wheel stamped with 1 is used for the first step, 2 is used for the final step.
Step 2
-Secure the polishing wheel marked “2” to buffer with a flange on either side. Do not use any polishing compound on this wheel. Use the same techniques described in step 1, without the compound.
-If you have a hazy finish, keep polishing with very light pressure and move slowly across the part until you achieve a clear glossy finish. Do not apply heavy pressure.
-If you notice any areas that have scuffs, you can go back to step 1 of polishing to correct these.
-Always wear a dust mask or respirator and eye protection while buffing!
-If you have problems while polishing, refer to the troubleshooting guide at the bottom of this tab.
After Polishing
It is not recommended to use a clear coat over plastic, since the durability is not great and it poses a larger problem once it needs to be stripped off. A good temporary protectant is the Cerakote Ceramic Sealant.
Sander Recommendations
Drill (you'll want one that goes up to 3000 RPM for best results)
Buffer Recommendations

Frequently Asked Questions
Which method is the fastest?
Machine sanding with either a 5" or 6" orbital or dual action sander will be the quickest method. Using a bench grinder for the polishing stages takes less time and produces a better finish than using a drill. It is still possible to achieve a great result sanding by hand and polishing with a drill, but it will take more time.
Will the polishing wheels burn my plastic?
The polishing wheels must be used with caution, since heavy pressure will result in burns. The wheels are intended to be used with very light pressure, they produce the best result when doing so. It is a good idea to test the wheels for the first time with a spare piece of plastic to get the technique and pressure dialed in.
Does this kit fix my yellowed gas tank?
Unfortunately, sanding and polishing will not remove the yellowing you commonly see on white gas tanks. This yellowing is through the entire plastic layer and cannot be sanded out. Sanding and polishing will still produce a nice looking part, although it won't be perfectly white.
My plastic has a white crease mark, can that be fixed?
This kit will not fix white crease marks on plastics.
Will this kit work on black plastics?
Yes, it will restore black plastic. Keep in mind that black plastic shows scuffs and scratches more easily than other plastics, so the sanding and polishing on black plastics is more tedious and time consuming.
How can I protect the finish after polishing?
A good ceramic spray protectant is Cerakote Ceramic Sealant. It is not recommended to use a clear coat paint over plastic, since the durability is not great and it poses a larger problem once it needs to be stripped off.
What drill can I use?
It is best to use a drill that goes up to 3000 RPM. Here is a cheap drill that we recommend.
What sander works with this kit?
Below are two low priced sanders that pair well with this kit.
What bench grinder / buffer is best for polishing?
Tags: Plastic Polish, Polishing, Buff, Buffing, Sanding, Refinish Plastic, Finish Plastic, Restore Plastic, Fix Plastic
Tracking Information Tracking numbers will be uploaded to the order page and sent to your email inbox. It may take up to 24 hours for the tracking page to show the most recent information.
Returned Packages Please double check your order before checking out. Is your shipping address correct? Are the items in your cart correct (buffer shaft size, year, model, etc)? Any packages returned to us because of an incorrect address or item will incur a $10 fee.
We are not to be held responsible for stolen or lost packages, packages sent to the wrong address, or refunding/replacing packages in these scenarios. It is the customer's responsibility to file all shipping claims.
Returns We accept returns within 14 days after your item has been delivered. If 14 days have gone by since your item was delivered, unfortunately we cannot offer you a refund. To initiate a return please send us an email at sales@prymemx.com. To be eligible for a return, your item must be in the same condition that you received it. The item must be unused / unworn and original tags attached. No returns allowed on sale/clearance items.
Returned Packages Please double check your order before checking out. Is your shipping address correct? Are the items in your cart correct (buffer shaft size, year, model, etc)? Any packages returned to us because of an incorrect address or item will incur a $10 fee.
Refunds Once your return is received and inspected, we will send you an email to notify you that we have received your returned item. Your refund will be processed and a credit will automatically be applied to your credit card or original method of payment, within 7 days.
Late or Missing Refunds If you haven’t received a refund for your return yet, first check your bank account. Then contact your credit card company, it may take some time before your refund is officially posted. If you’ve done all of this and you still have not received your refund yet, please contact us at sales@prymemx.com.
Shipping Costs You will be responsible for paying the return shipping costs of your item. Additionally, the original shipping costs will not be refunded.
Exchanges If you need to exchange an item, please see our refund policy above and include exchange instructions with the return. We do not offer exchanges on out of stock items. If the item is out of stock then we will refund you instead. The buyer is responsible for all shipping costs on exchanges.
Incorrect or Defected Item If we made a mistake with your order, please contact us at sales@prymemx.com. We will provide a return label if an exchange needs to be made. You must notify us within 14 days of delivery of any defects with the item. Any claims past 14 days will be considered wear and tear, and cannot be replaced.
Customer Reviews
Hey have not used the kit yet, as I upgraded my grinder and has the 9/16 shaft size, have just machined up a new shaft and fitted one of the pryme pads up, and gave a quick buff, and am impressed for the little work I did..
Look forward to hopefully getting results like Cameron,
Will be getting in to my build this week and plan. To use for zinc plate prep..
Will put your product out on my youtube channel StayTrue TV
Try get you some more sales from Australia..
Hope your doing well 👍
Clint
Very good product👍
Perfect. Make life a hell of a lot easier with the sanding wheels on the bench grinder.

Plastic Polishing Kit
worked perfectly thank you